Your ZEN56 RGBW Dimmer can be quickly added to Home Assistant! We recommend using the new JS Z-Wave integration for optimal results
With the new ZWaveJS integration of Home Assistant, your smart home setup becomes more seamless, robust, and future-ready. We strongly recommend upgrading to this integration to ensure your Zooz devices are recognized and function correctly.
There are so many creative ways to use the ZEN56 RGBW Dimmer on Home Assistant; we've included a few simple examples below to get you started!
Automations
In the following example, we're having the ZEN56 run the Rainbow option for the Color Animation preset. For more Color Animation Preset options, check out the article here.
From the ZEN56 device screen, click the + on the Automations section.
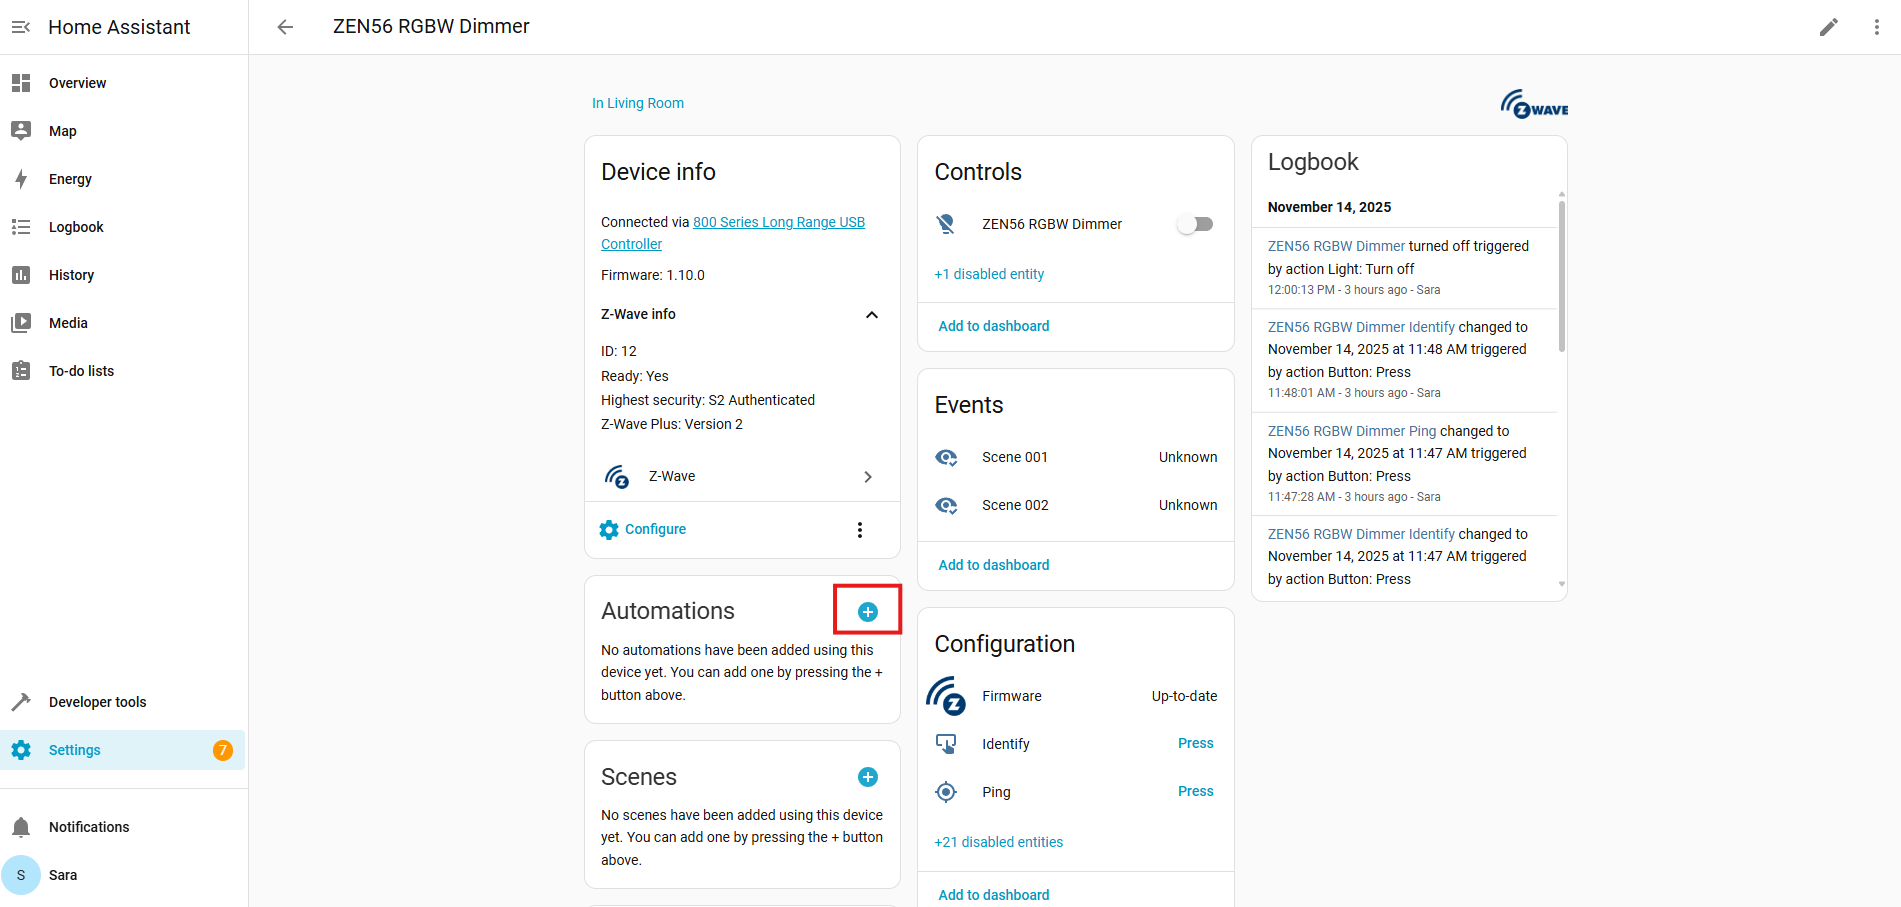
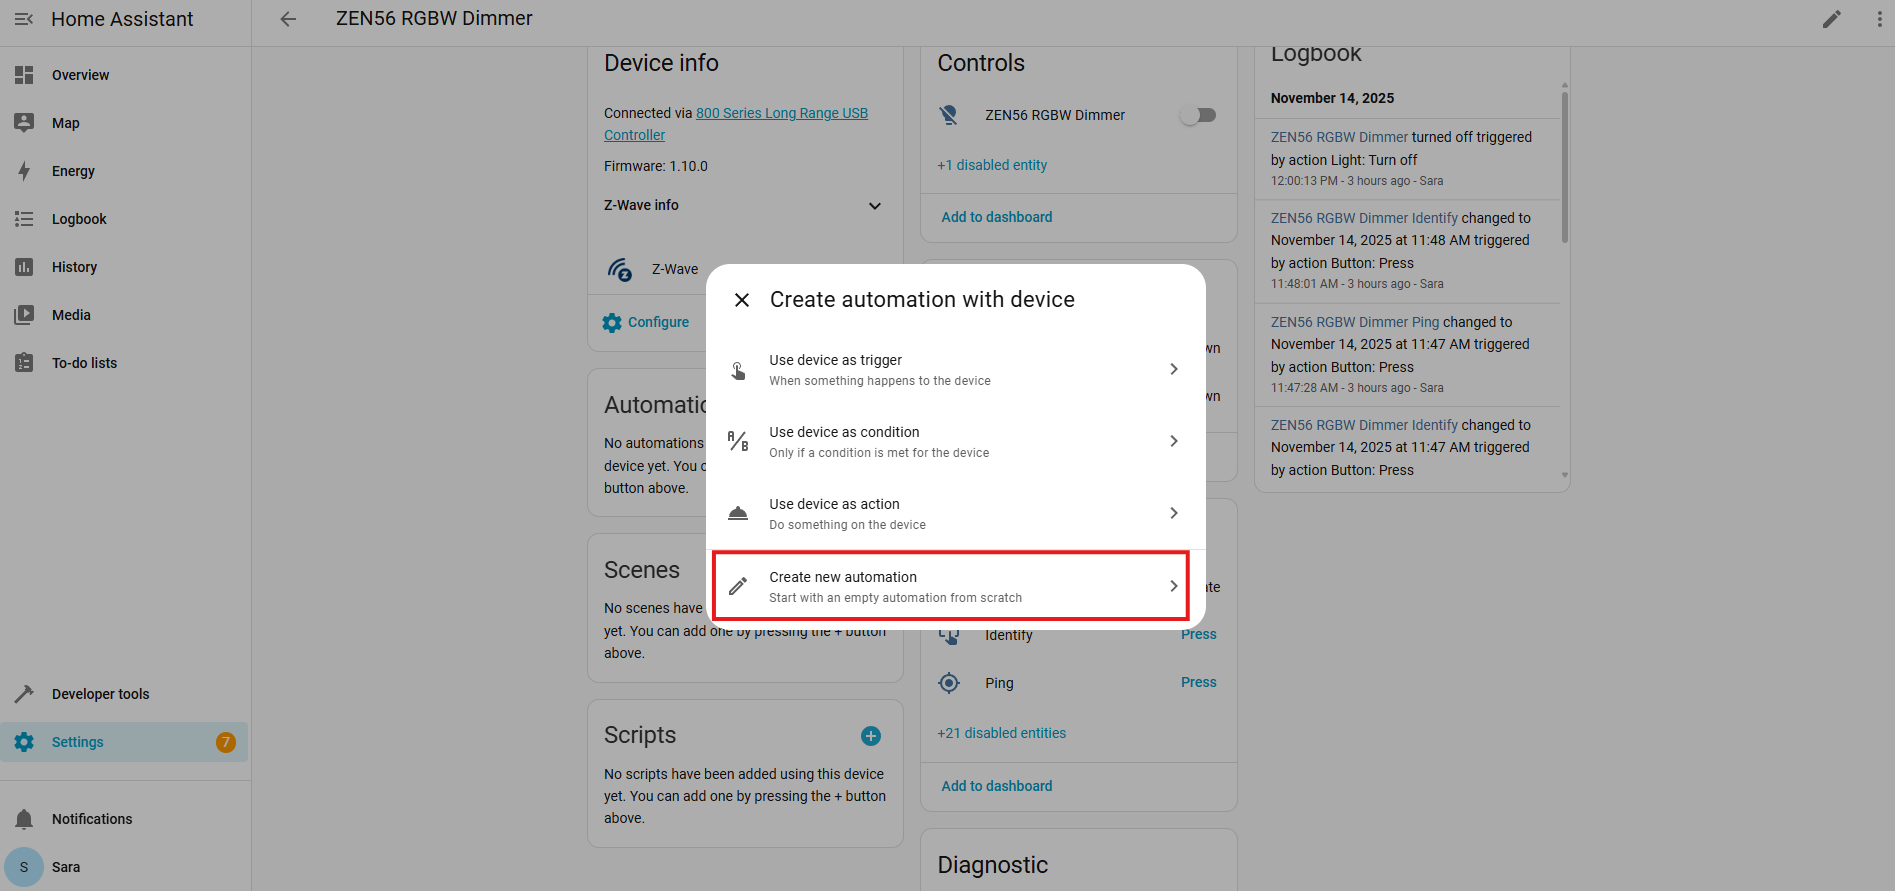
For this example we're using the Create New Automation option.
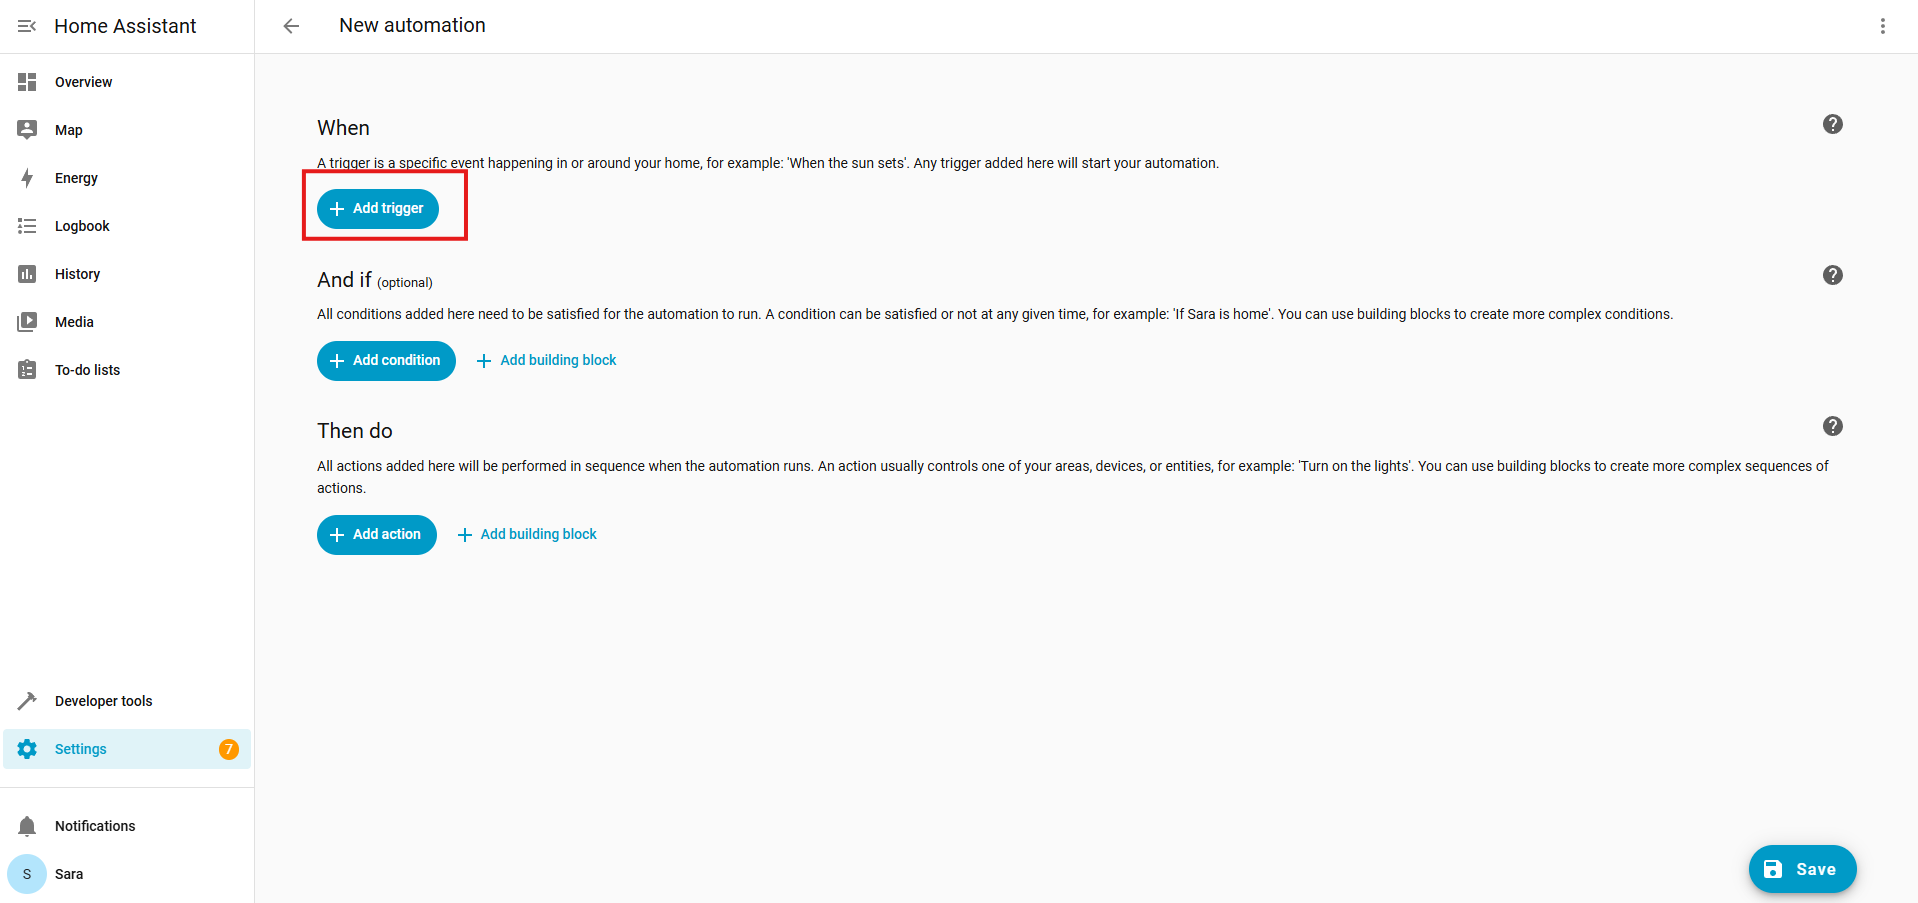
This will bring you to the automation creation section. Under When > click + Add trigger.
Under Add trigger > click Device.
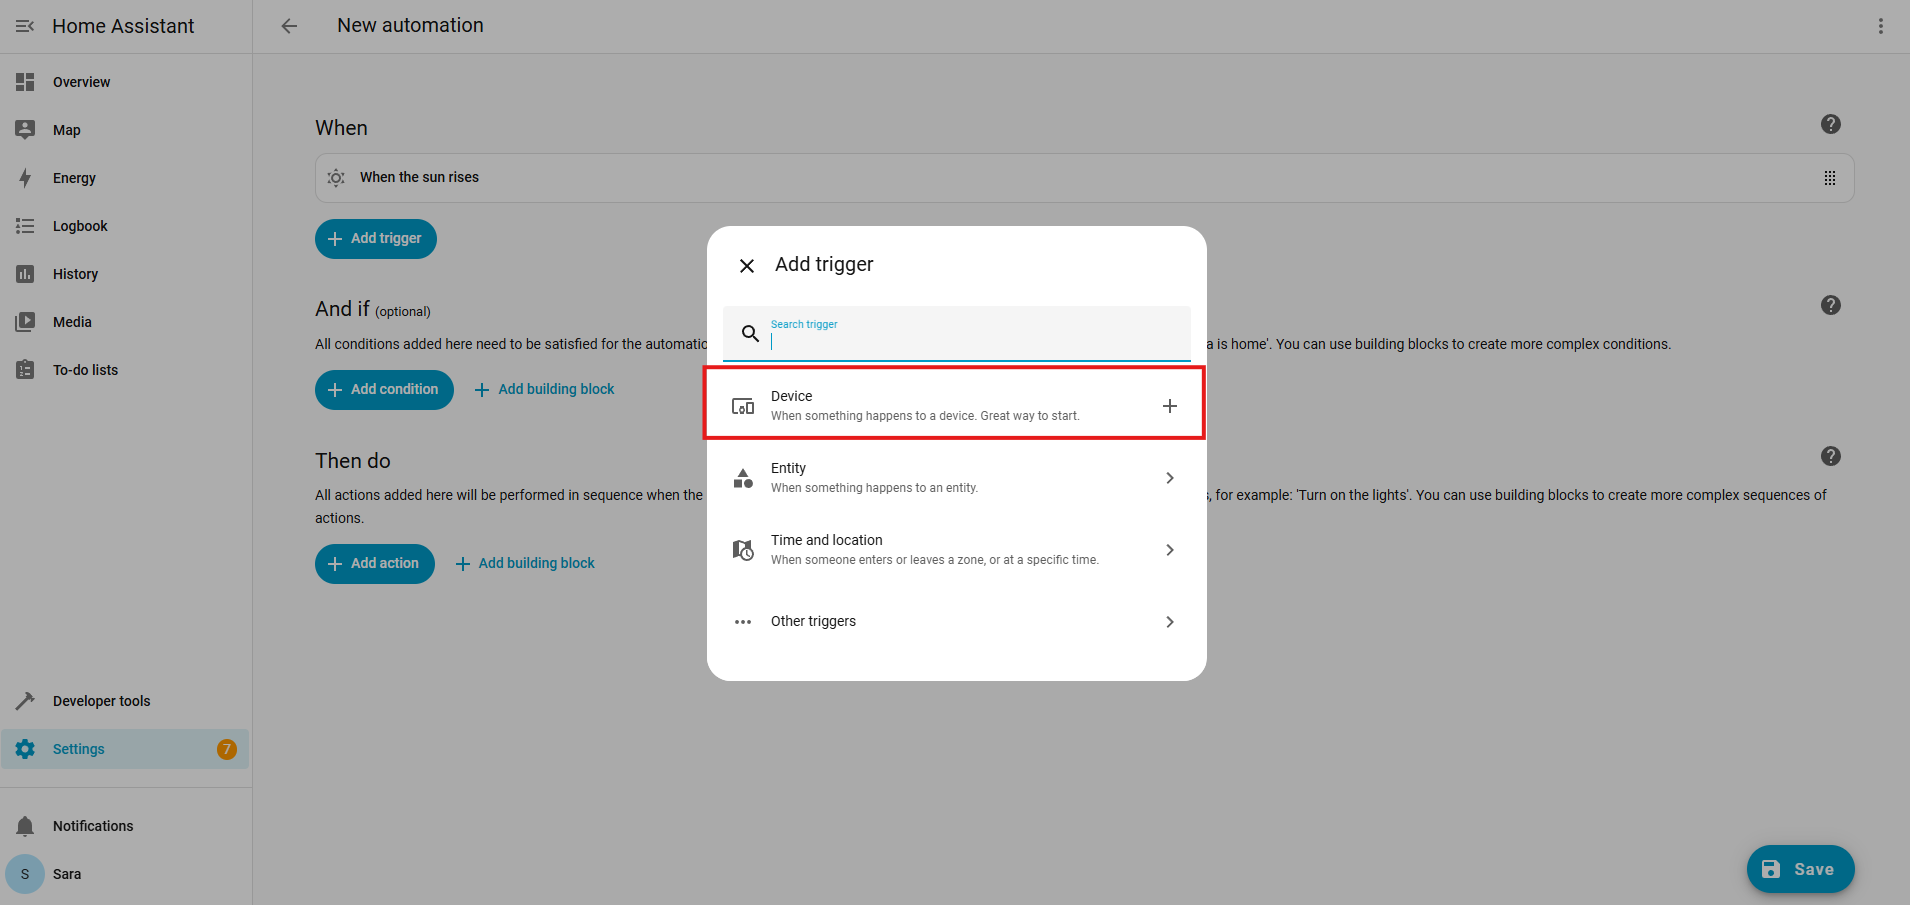
This will open a new box. Click Select a device.

For our automation, we're using the ZSE11 Q Sensor, with the trigger set to Motion Detected.
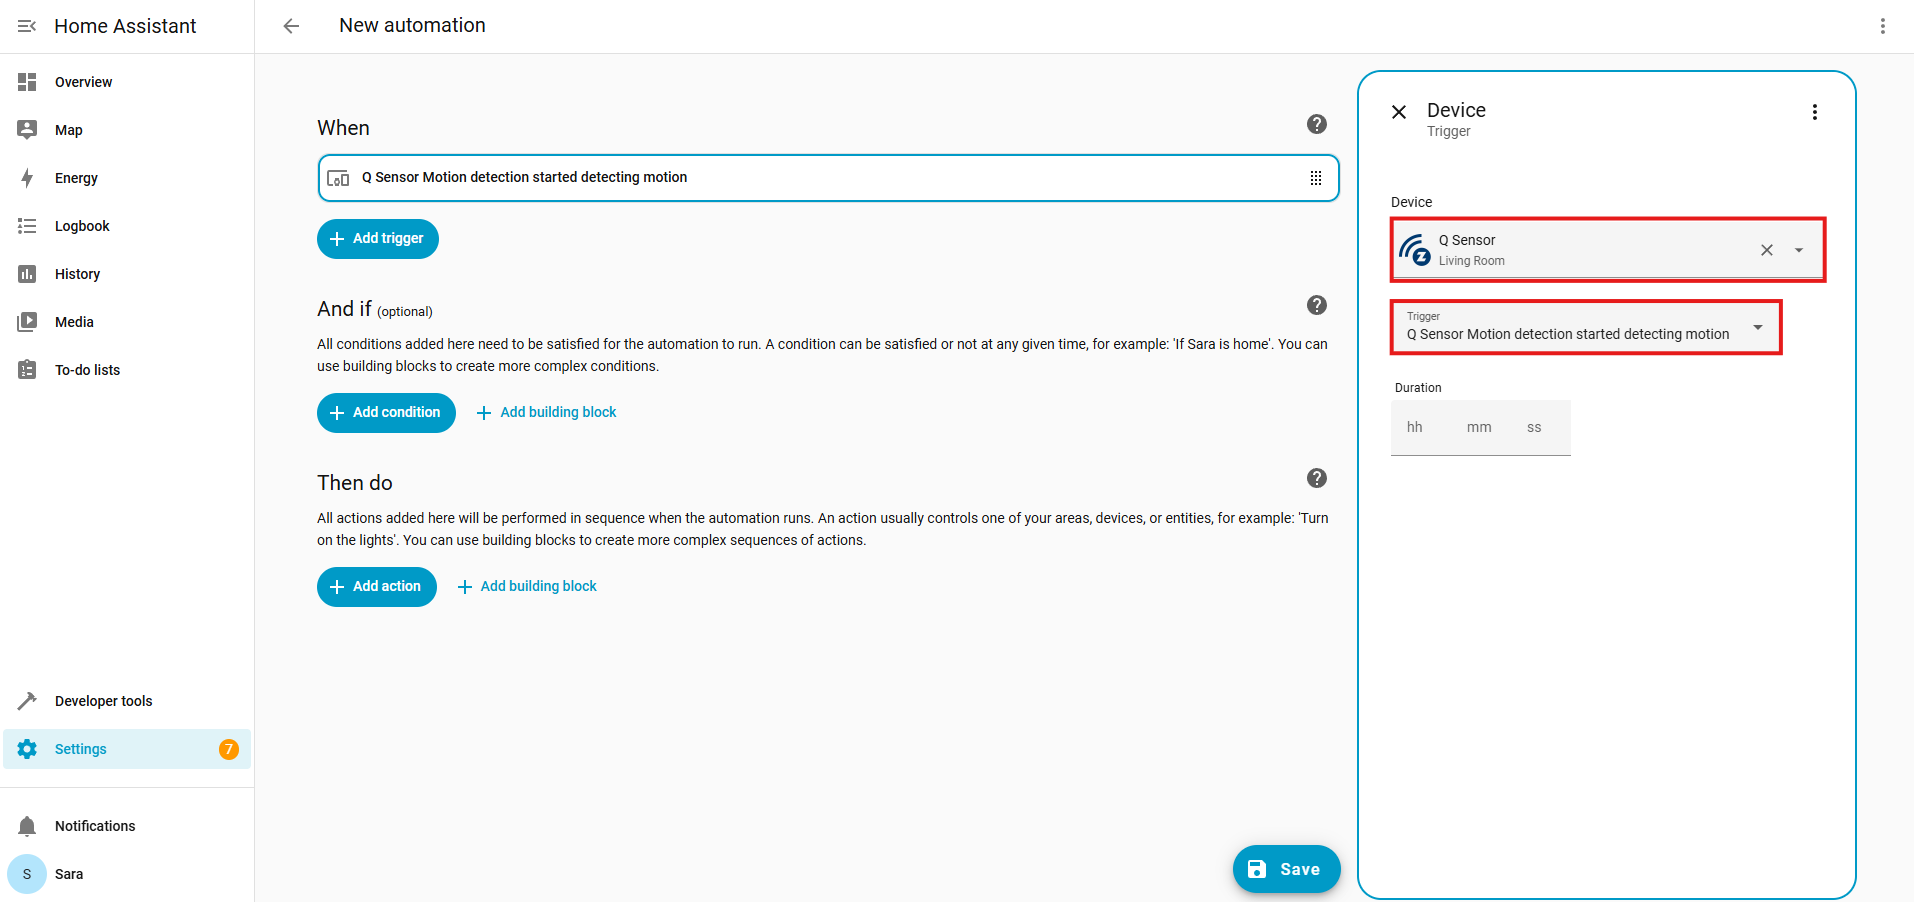
You can choose to add conditions to your scene. Once done, click +Add action under the Then do section.
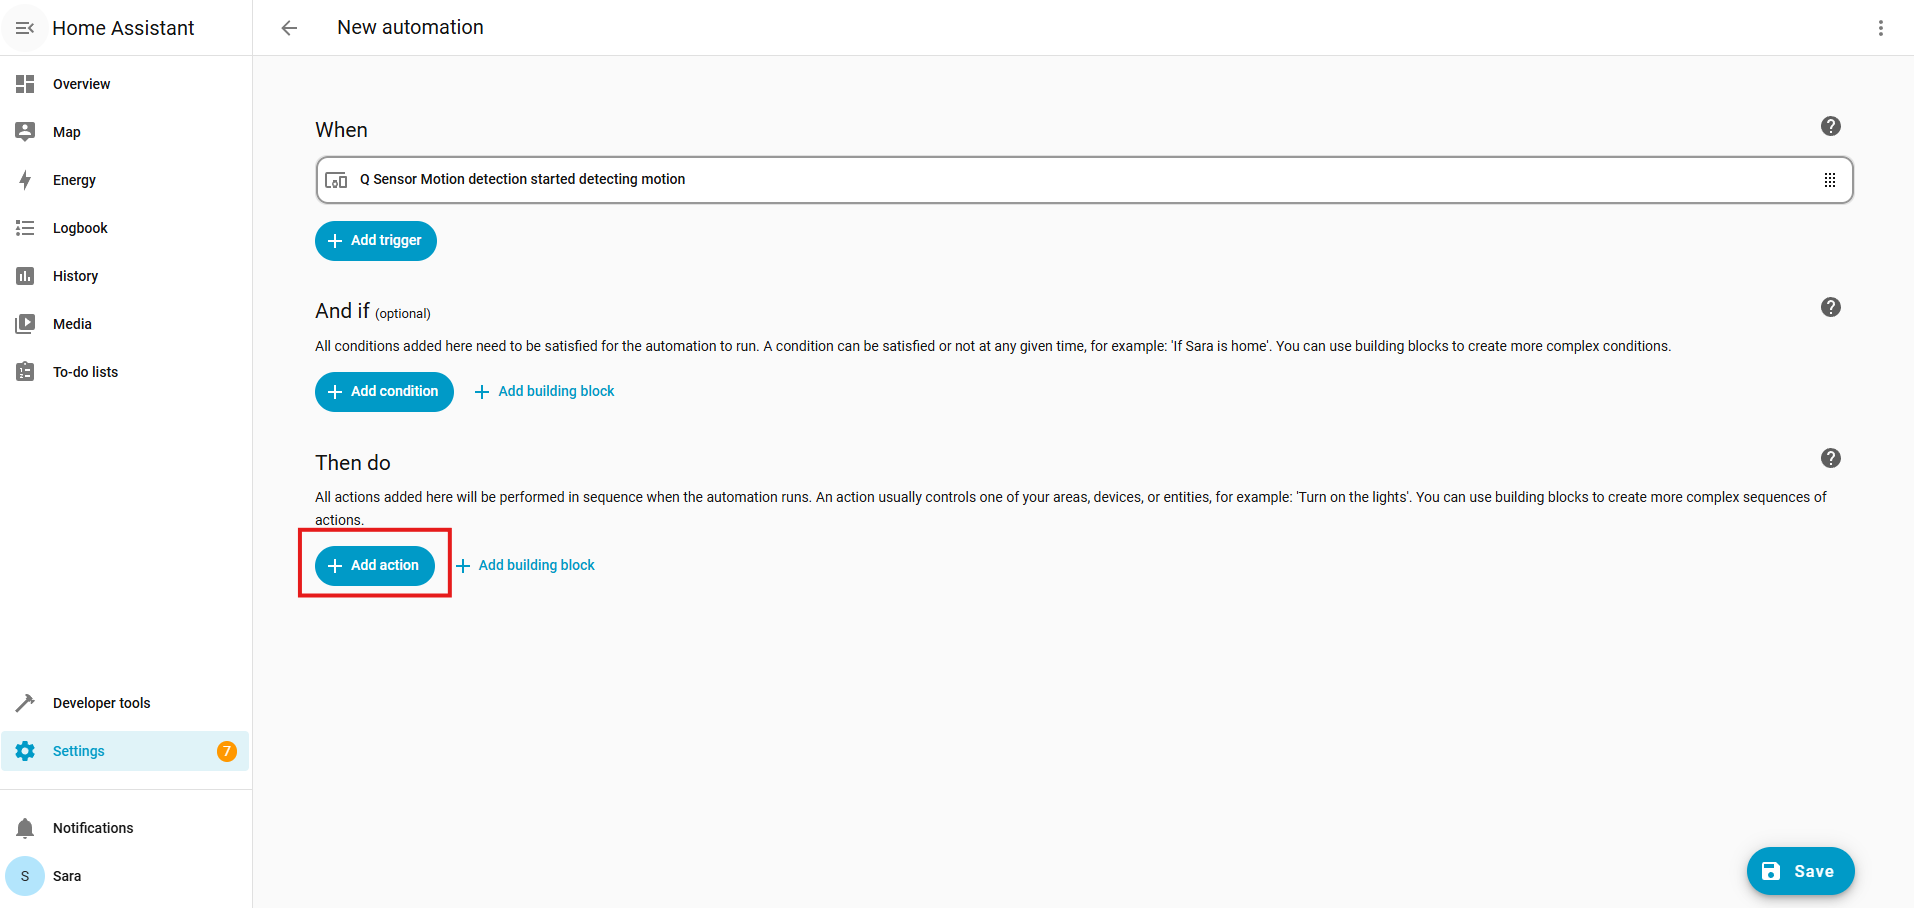
Under device, we're selecting the ZEN56 RGBW Dimmer. For the action, we selected Set value of config parameter 17 (Color Animation Presets) on endpoint 0, and we selected value 3 (Rainbow).

Now, any time the ZSE11 Motion Sensor reports motion detected, the ZEN56 RGBW Dimmer will turn on Color Animation Preset (Parameter 17) to Rainbow (value 3).
Set Custom Colors via Scenes
The beauty of an RGBW dimmer is the ability to set custom colors and use these various colors in different scenes and automations. Below is just one example of a programming option. Remember, Home Assistant is very dynamic, and what you can accomplish once you have a grasp on the programming options is almost endless. We're happy to provide some basic examples, but the Home Assistant documentation and HA community will be the best resource for advanced programming assistance. We are not able to assist with any YAML programming.
Create a Scene for Each Custom Color
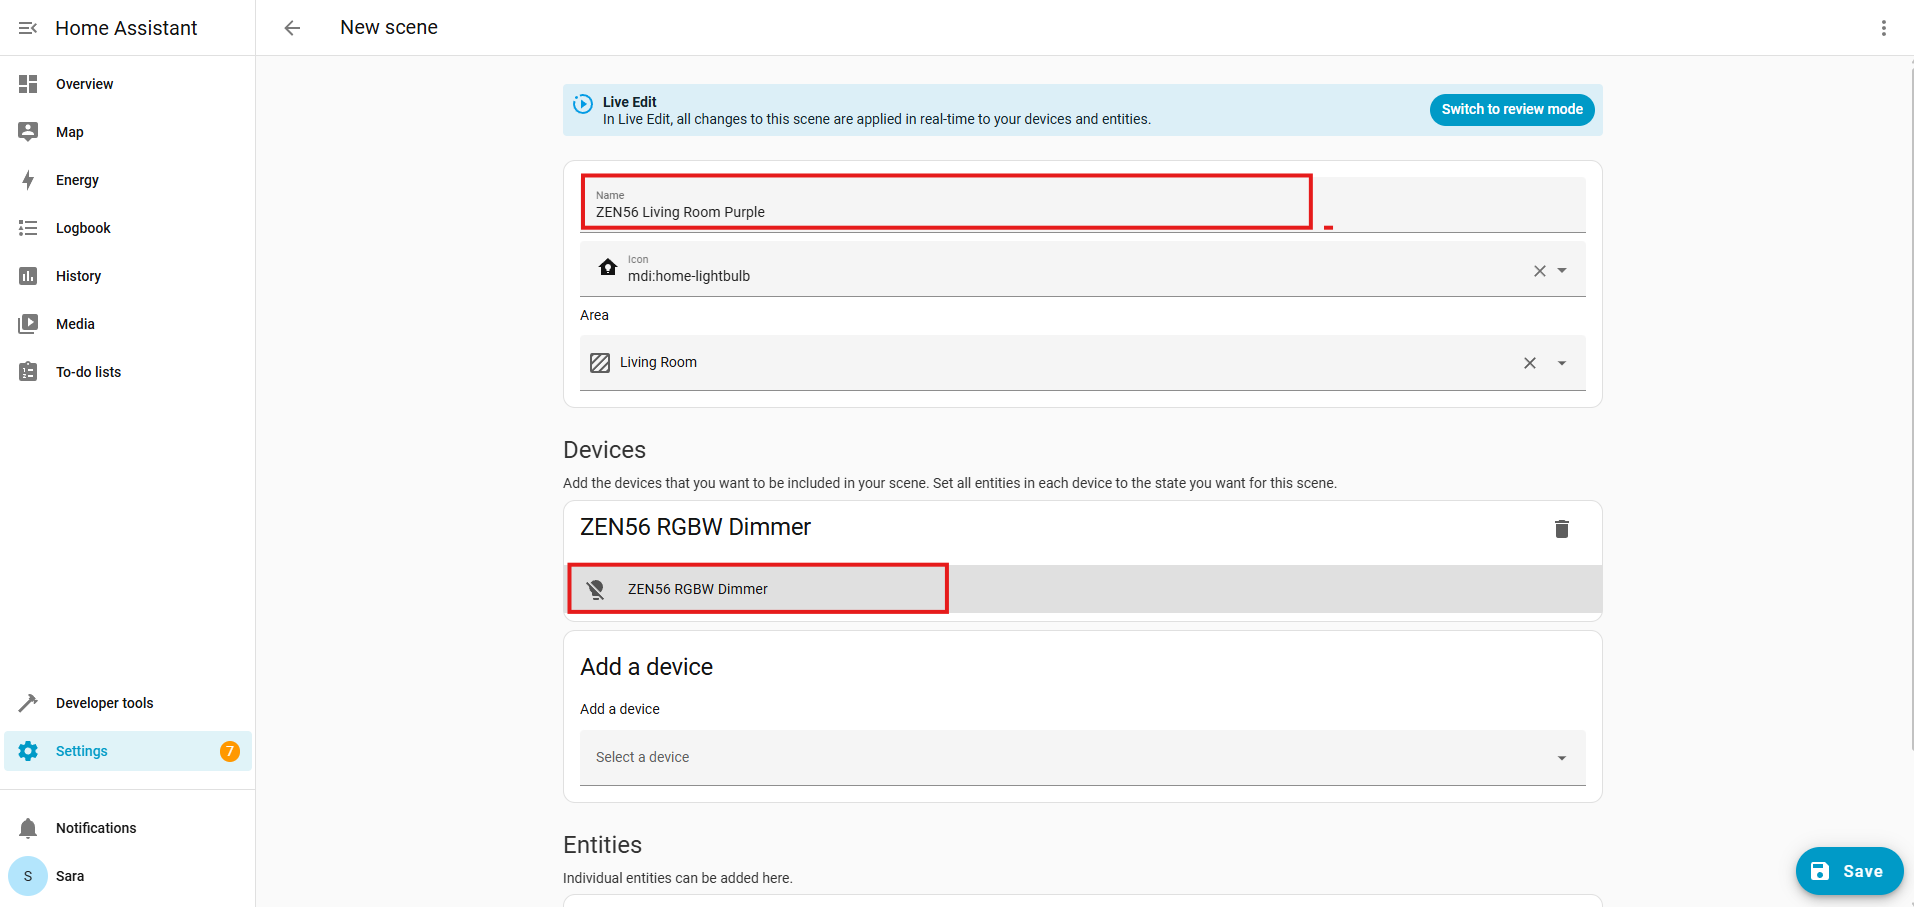
Go to Settings → Automations & Scenes → Scenes → Add Scene.
For each scene:
-
Ensure you name your scene clearly for the color option; here we're using purple. Select the ZEN56 RGBW Dimmer under Devices. Click on the shaded ZEN56 RGBW Dimmer.
- Pick your custom color using the color wheel or Hue/Saturation sliders.
-
Set brightness if needed.
-
Name the scene clearly (e.g., “ZEN56 Green,” “ZEN56 Orange,” “ZEN56 Purple”).
-
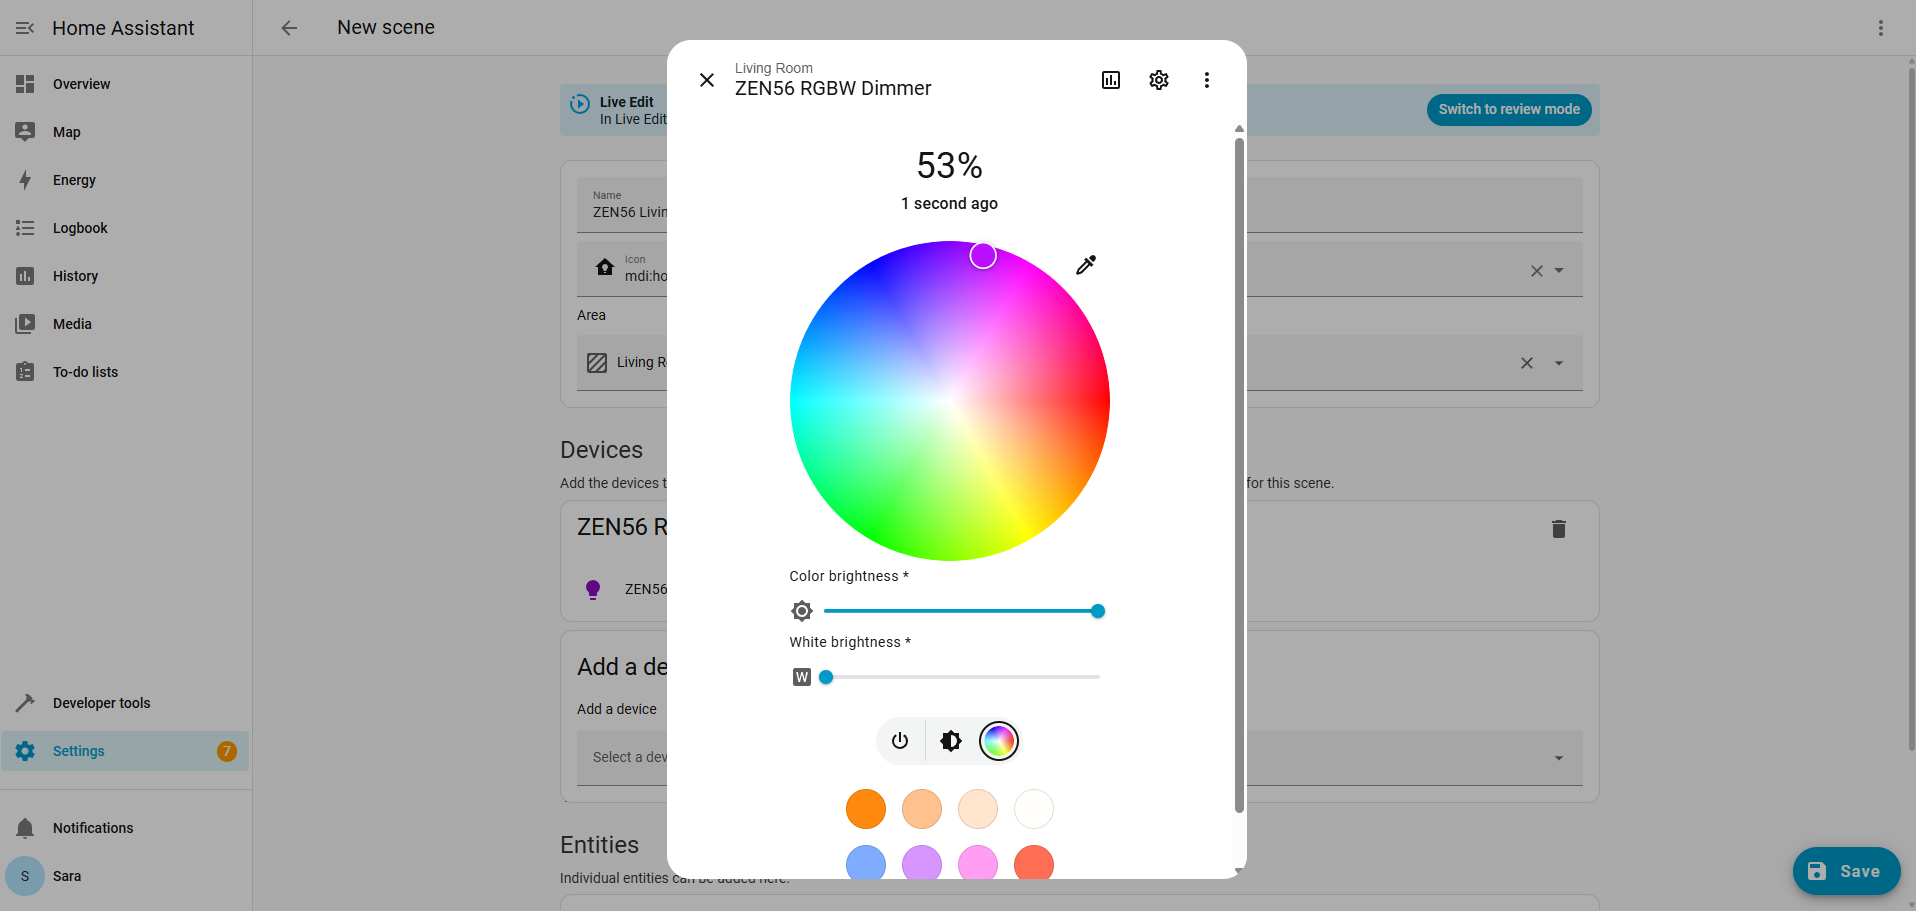
- Save your scene.

-
Repeat this process for each color you want. You'll end up with various scenes, each containing your custom color selection. Each of these scenes will store the exact color and brightness level you have set, so you won't need to recalculate when using the scene in different automations.
Trigger Scenes via Automations
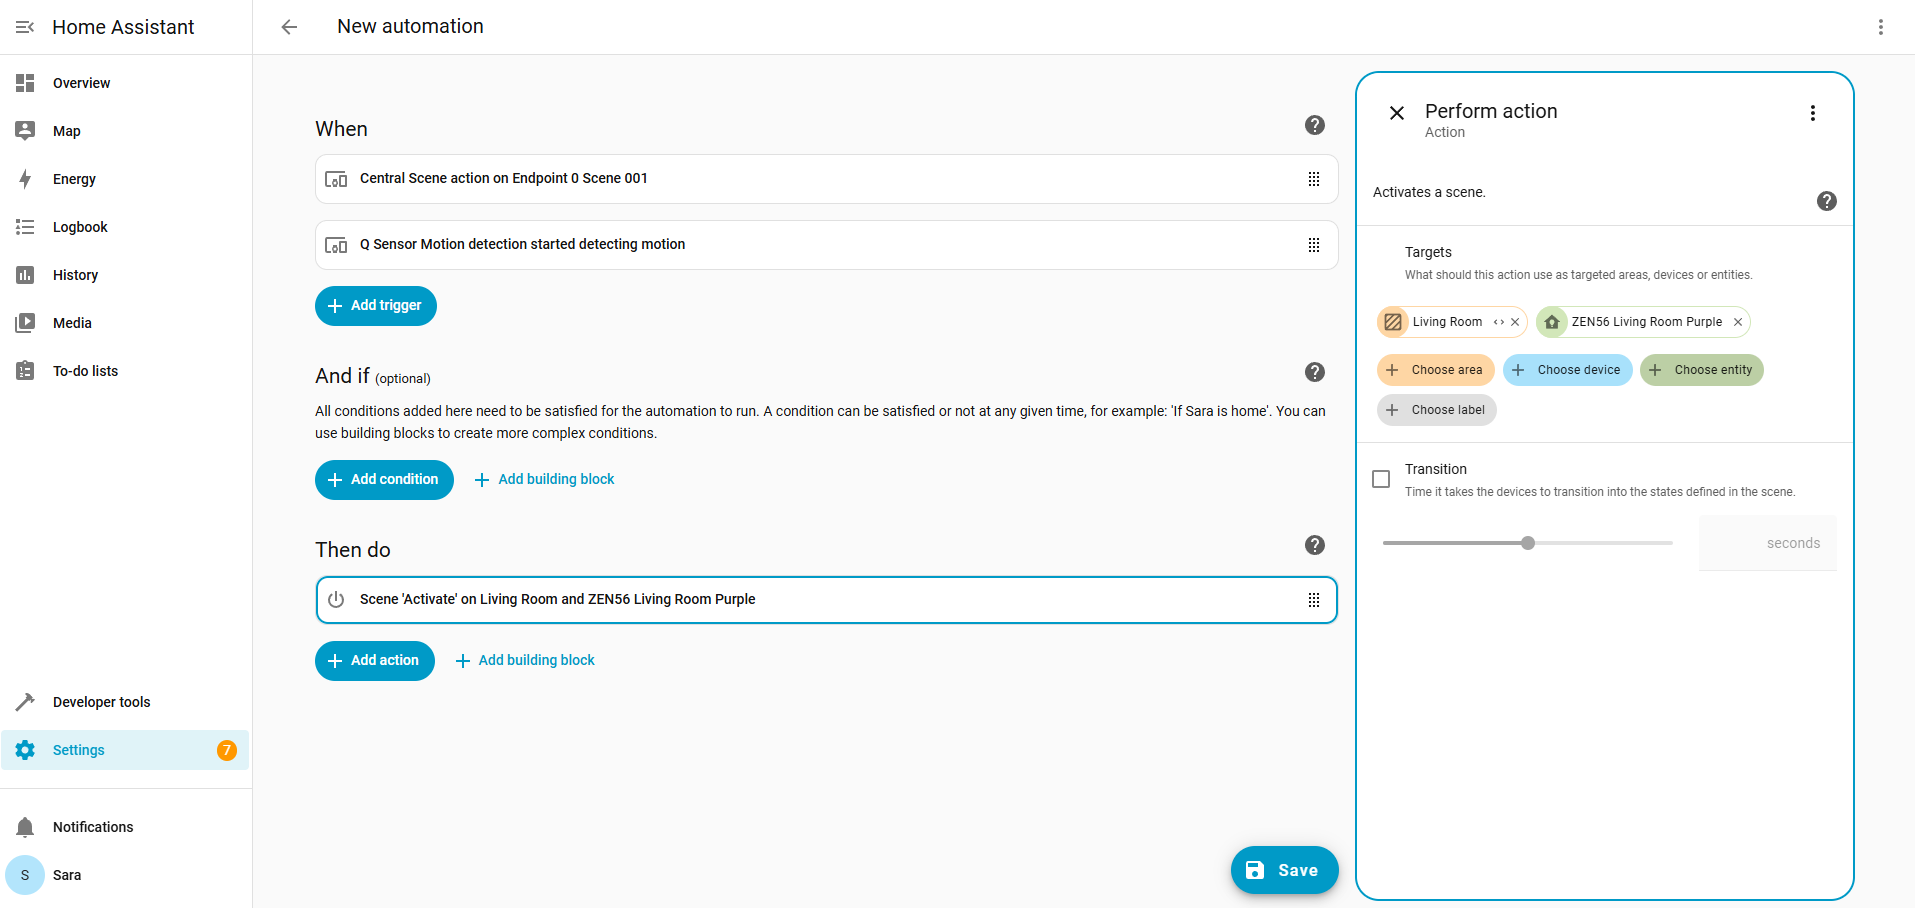
You can have as many automations as you like, each activating a different scene. For example:
-
Automation 1: Trigger = Motion detected (ZSE11), Action = Activate “ZEN56 Green” scene.
-
Automation 2: Trigger = Motion detected in another room, Action = Activate “ZEN56 Orange” scene.
-
Automation 3: Trigger = Time of day, Action = Activate “ZEN56 Purple” scene.
Below is an example automation calling the ZEN56 Living Room Purple scene that we just created above!